Pumpkin carving and relaxing by the campfire are just two fun things you can do during the fall. In addition, the fall season is frequently a good time to enter the housing market.
There may not be as many people interested in purchasing a home during the fall as there are during the spring and summer; nevertheless, you may have less competition if you choose to sell your home during this time, and motivated purchasers may want to move into a new property before the holidays.
However, before prospective buyers visit your property, it may be good to know our best way to stage your home for sale with our valuable ways inspired by autumn to help it stand out.
Here are the five best ways on how to stage your home:
As autumn continues and the days get shorter, the amount of natural light that enters your home may decrease. You may ask, "How to stage your home using those lights?"
Well, one trick is to use more light around your home since well-lit rooms will make the space look larger and more inviting.
As you move from room to room, you should investigate to see if you can improve any dark with additional illumination. You can keep the lights in your home on timers so that they turn out after the showing, but you should inspect your lamps and light fixtures regularly and replace any bulbs that have gone out.
Painting the walls is another option to consider if you want to increase the amount of light that enters a particular room. Go for neutral colors, such as white and gray to make the living area more relaxing.
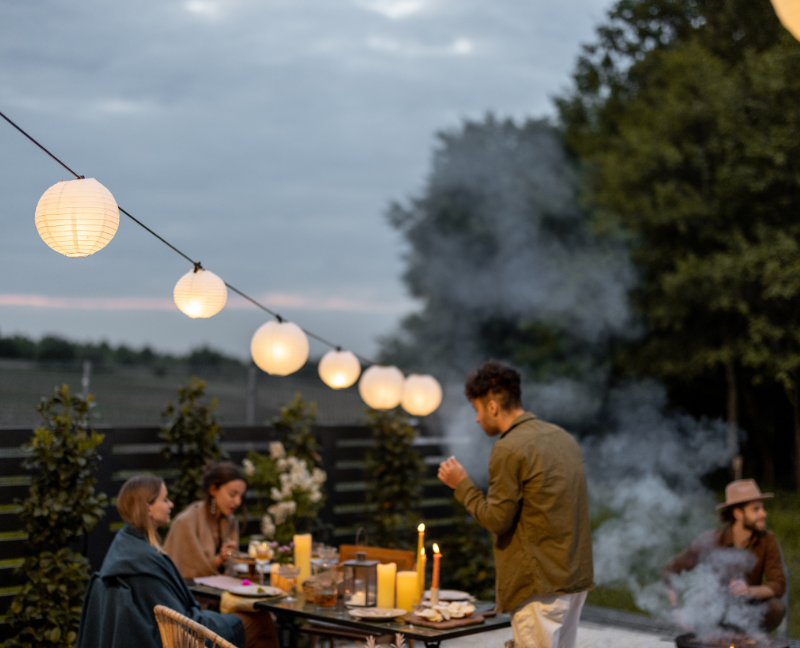
If your guests will be there after dark, you should remember to leave the outside lights on so that they can have a better look at your house and yard. This will also make warm and friendly lighting possible to greet guests, increasing your home's curb appeal.
During a showing of your house, it is essential to maintain the highest level of comfort possible, particularly in regions that see chilly fall days. If you have scheduled an open house, the ideal temperature should be between 70 and 73 degrees throughout preparation.
If it's too hot, the prospective customers can start to perspire and become distracted. People may become concerned that the heating system is malfunctioning when it gets too cold.
The fall season is when coziness and convenience are of the utmost importance. Utilize this to work to your advantage and spruce up your sofa or armchairs by adding throw pillows and accent pillows in a color scheme inspired by fall. If the floors in your home are hard surfaces like tile or wood, you can also put plush rugs all about the house.
If your home has a fireplace, you should store some wood beside it so prospective buyers might picture themselves snuggling up in front of it on a chilly autumn day. You can suggest to your real estate agent that they light a fire in a gas or electric fireplace during the showing so that the space feels more at home.
Even though summer is gone by, help your outdoor area look more inviting to your buyer. Here are some tips that can help you improve the look on how to stage your home:
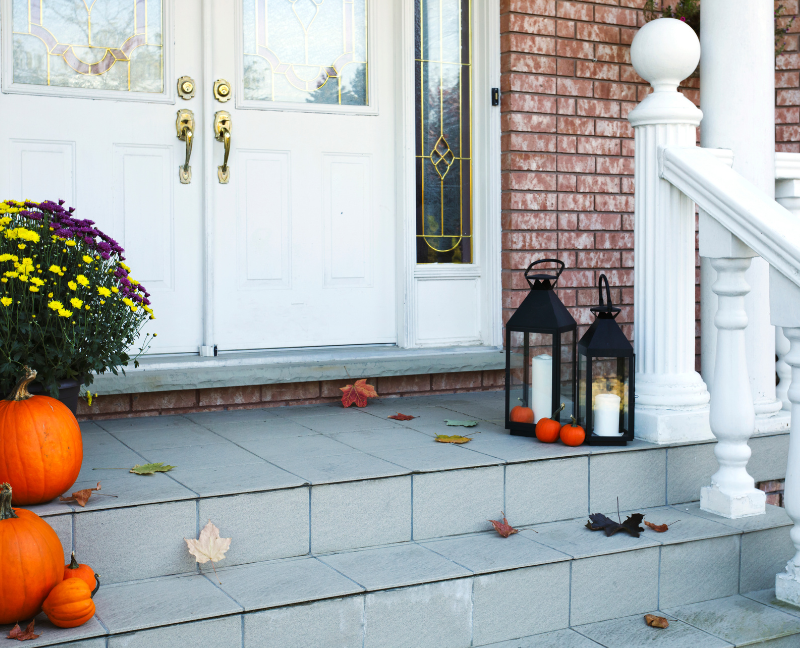
Putting one or two fresh pumpkins on your front porch can create the feeling of being at home while adding a splash of color if you wish to decorate the front of your house for fall. However, you need to keep a close eye on the gourd to ensure it doesn't start showing any signs of rotting, as this is a huge red flag for prospective purchasers of homes.
Finally, this is the least valuable way to stage your home. Even though you might enjoy decorating for holidays like Halloween or Thanksgiving, storing your decorations while trying to sell your house is best. Seasonal decorations should not be overdone; some can even turn off prospective homebuyers. Instead, limit your decor to a classic fall motif, such as a wreath or color scheme.
Looking for more fall staging tips? Check these blogs for inspiration:
You may also visit our website for more content like this.
In the first part, we've discussed what home staging is, how home staging might maximize home appeal, and how you can do it. Now, let's learn more valuable tips to help increase your home's value through home staging.
There are so many ways to attract home buyers that it can be overwhelming, but don't worry, we're here to make it easier for you.
Home staging, as mentioned, is one of the most effective ways to increase home value and you can start this by decluttering.
Living Room
Get rid of personal stuff, furniture, and decorations. Add warmth and charm to the area using neutral hues and subtle accents like throw cushions or fresh flowers.
Kitchen
Kitchens are one of the three crucial areas of a property that may make or break a buyer, so they must be functional and clean. Clear surfaces and organize cabinets to create space. Upgrade old fixtures and appliances if needed. Display some nice kitchenware or utensils to make the kitchen feel cozy. Bring in as much natural light as possible and use well-placed artificial lighting to accent the countertop and eating area.
Bedroom
Let's now focus on the bedrooms. The aim is to establish a calm and unwinding atmosphere. Depersonalize and clear the area to start. To make the bed look appealing, ensure the sheets are clean, and add attractive cushions or a throw blanket. Remove any extra furniture to give the impression that the space is more significant. Add soft lighting, like bedside lamps or wall sconces to create a cozy atmosphere. Lastly, check that the closets and wardrobes are tidy and not stuffed with clothing.
Outdoor Spaces
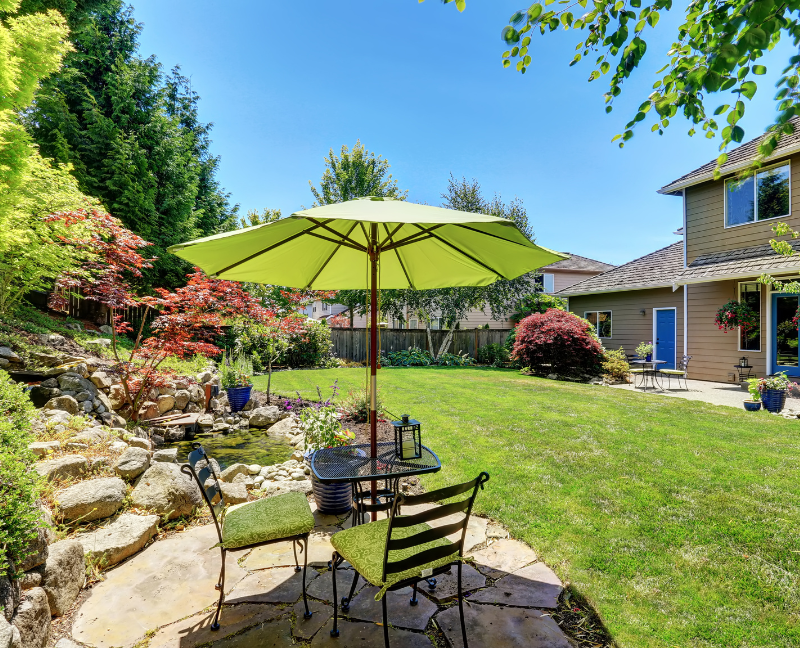
Don't overlook the outdoor spaces. For homes to sell, curb appeal is essential. Ensure that the front of the property is kept up and has well-kept community spaces or landscaped gardens, and perhaps some potted plants or flowers to provide some color.
Any outside living areas, such as patios or balconies, should be cleaned and cleared of clutter. Set up some outside furniture to establish a warm and cozy ambiance. If you want to showcase the space's best qualities, consider installing outdoor lighting, especially if you intend to display the house at night.
Finally, staging various parts of a property involves close attention to detail and a concentration on developing a warm and inviting ambiance. The best qualities of each space can be highlighted by decluttering, organizing, and adding appropriate finishing touches. This will help prospective buyers picture themselves residing in the area. The idea is to make the space neutral and welcoming so potential purchasers may imagine themselves making it their own.
Property owners have two alternatives available to them regarding home staging: staging the home themselves or hiring an expert. Both ways have advantages and disadvantages, and the choice should ultimately depend on various considerations, including time, money, and skill. Let's talk about each alternative's benefits and drawbacks so you can decide which one to go with.
Pros & Cons Of DIY Staging
DIY staging can help save money for property owners with time, ingenuity, and effort. It also avoids additional costs from hiring professional stagers.
This also lets you customize the design to your preference. However, it might demand interior design and real estate marketing skills to succeed, however, there are many resources online that can help with this.
Pros & Cons Of Hiring A Professional Home Stager
Working with a professional home stager can provide considerable skill and experience. Their attention to detail lets them showcase your home's best characteristics while minimizing its drawbacks. They may have furniture, accessories, and decor items to make your home shine.
Professional stagers know the local market and buyer preferences, which can boost your chances of selling your property quicker and for more. However, one must consider the price of hiring a professional stager. Their fees depend on your property's size, condition, and staging needs. The return on investment may make hiring a professional stager worth it for some homeowners. In addition, skilled stagers can save you both stress and time by renting furniture, arranging, and designing the room.
Whether you do it by yourself or hire a professional, home staging takes time, money, and effort; however, with so many incredible benefits, it proves to be a great investment! In such a competitive market, implementing this to sell your home could be a great help!
Home staging refers to getting a house ready for the market by decorating and organizing its contents in such a way that it would appeal to prospective buyers.
In this post, you will learn how to do home staging and the essential details and tips you need to know when it comes to home staging.
Home staging is not a requirement however, it is a helpful step that can create a warm, inviting, and visually appealing setting, enabling potential purchasers to picture themselves living there.
The purpose of home staging is to draw attention to the positive aspects of a given property.
When staging various parts of a house, some helpful suggestions and methods can help increase the property's appeal to prospective purchasers.
Getting rid of the clutter in the room and making it look and feel tidy are critical steps in the process. Take out all of your personal belongings (such as picture frames and medals), any surplus furniture, and any decorations that aren't necessary. Doing this allows potential buyers to visualize what they want to do in the space as they are not distracted by a crowded layout or any personal belongings.
Another way to improve the place is by adding warmth and personality to the room. Use neutral hues and stylish accessories, and place the furniture in a way that encourages flow and conversation.
Improving a property's appearance from the street is another strategy to stage it so that it seems as appealing as possible. This includes improving the property's exterior, such as landscaping, and ensuring the entry is inviting. First impressions are extremely important, and a properly maintained and aesthetically pleasing surface can significantly impact how a prospective buyer perceives the house.
Home staging also requires selecting and arranging furniture. Property owners should use furniture that matches the space's style and size. Organizing furniture to showcase space functioning and flow can also help buyers imagine living in the house they buy. A friendly, lived-in sense is crucial, but buyers need space to explore and visualize their stuff.
Lighting is essential in home staging. The vendors should maximize the natural light by drawing back the drapes and shutters and ensuring the windows are spotless. In addition, the strategic application of artificial lighting, such as lamps and spotlights, can contribute to developing a cozy and welcoming ambiance. In general, well-lit rooms give the impression of being more prominent and are more desirable to prospective buyers.
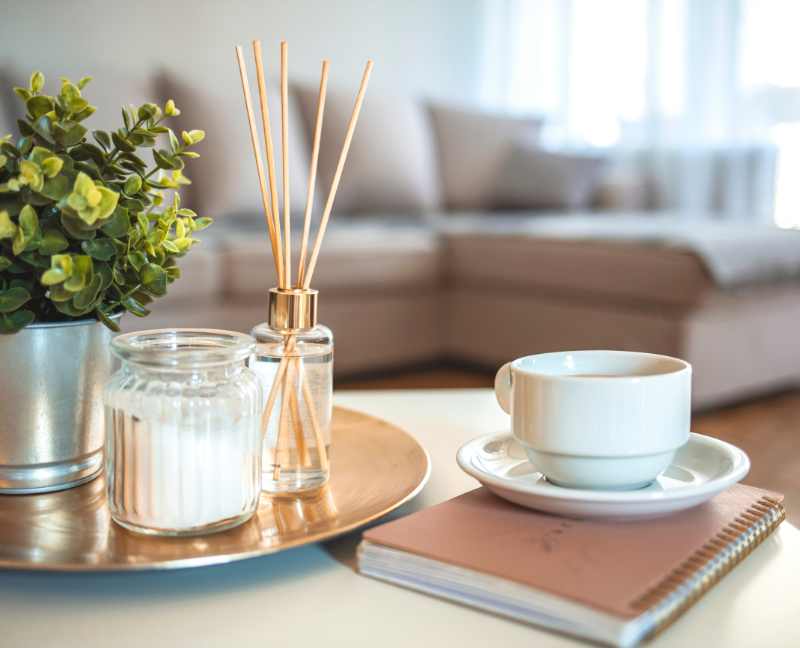
Furthermore, finishing touches and a friendly atmosphere can boost a property's attractiveness. This can be done with fresh flowers, scented candles, and decorative items. Cleaning and maintaining the property might improve purchasers' perception of its desirability.
Home staging may dramatically raise the property's perceived worth and attract potential purchasers, and this can be done by showing the home in the best possible light. Learn more tips on how to do home staging in Part 2.
Moving across the street or the country is already stressful, especially during this hot season of home buying and selling. Other than the daunting process, another challenge is the short supply of moving trucks due to the demand.
But, don't worry! We're here to make your moving day smooth and efficient by sharing a few tips on how to pack boxes for moving without breaking a sweat.
Go for a mid-week, mid-month move-in date. As the weekend draws near, the cost of movers and rental vehicles will rise. During regular business hours, dollies and elevators will be available for your use. Additionally, you'll have the entire weekend to settle down and unpack!
Contrast opportunity cost with moving firms while choosing one. As a general guideline, request estimates from three or more different businesses. Then, you'll be confident enough to select whichever, in terms of cost and service scope, best suits your demands.
Before you start packing those boxes, make sure you’ve decided on what not to pack. Focusing on things you want to declutter will help you know what to pack later on. Get rid of anything you don’t love, need or want. Bringing items you don’t need or want in the new home is a waste of time.
Moving in is already exhausting so avoid lugging anything you're just going to toss out later. Clean up everything from drawers, closets, and storage units before packing even begins.
To properly declutter unnecessary belongings, start by preparing four separate piles: a trash pile, a donation pile, a sell pile, and a storage pile.
Anything that’s not worth donating can go directly into the trash. Remember to throw away trash responsibly. Items that are used once or just a couple of times but are not worth keeping or selling can go to the donation pile. You can give your donations to charitable sites. It’s a win-win for you! You can help others at the same time let go of the items you won’t be needing.
Anything that is of value and worth can go straight to the sell pile. Easy-to-use apps for pre-owned belongings can help with that. Lastly, for items that you won’t be needing anytime soon but are not yet ready to toss, put them in a storage pile.

After deciding what to toss out and toss in with those boxes it’s time to organize them. Using box labels, sharpie markers, and color-coded stickers or tape will make it easier for you to keep track of what’s inside each box, especially if you don’t want to lose items during the move.
Organizing your boxes will also help movers (and yourself) know where to put everything once inside the new home. You also want to avoid filling one box with heavy things such as dozens of books. Remember, large boxes should contain lighter items, such as blankets and pillows, and small boxes should contain heavier items, such as pots and books.
Once you’ve organized your things, it's time now to pack! Are you ready to begin?
To make packing more efficient, focus on the room one at a time. Begin with rooms you won’t need in the coming days or weeks leading up to the move. For example, packing up your closets, libraries, and living room could take at least a month or two before your move date. While rooms to pack last might include bedrooms, bathrooms, child’s playroom, nursery, and kitchen. Labeling each box according to the corresponding rooms will also make it easier for you to find as it is organized.
You don’t want to break those precious vases when moving so to ensure all your valuables are safe, have plenty of packing peanuts, lots of newsprint, box inserts, bubble wrap, and tape on hand. If you are also thinking of packing your plants (yes, you can transport them) with some smart thinking and careful planning, plants can be safely transported to your new home to continue to thrive there.
Here are some recommendations that will help you along the way with your plants. Hydrate your plants before uprooting them. Give your plants a trim. Uprooting your plants with care by watering them before digging up and keeping as much soil attached to the roots. Re-plant as quickly as possible. You may also take a photo of your items before moving just in case it gets damaged. After packing up each box, make sure the tops, bottoms, and sides are all taped and secured properly.
The label holds the key to easy unpacking. Clearly label the top and at least two sides ( enough for you and movers to read). Wrap the marker in packing tape or clear tape to prevent tearing and scratching.
If you are thinking of packing hazardous items consider transporting them separately. Disposing them will make it a lot easier for you. Items like paints, varnishes, cleaning chemicals, and more can be packed together in plastic bins before putting them in the box to avoid spilling. Medical items and medications should also be kept separately and if decided to dispose of, they should be disposed of properly for others' safety.
Pack a few essential belongings and keep them with you during the move and be sure to make it organized as possible. Keep your valuables, such as expensive jewelry, watches, bags, and sentimental items on you during the move. We don’t recommend transporting these on a moving truck, this is also for your peace of mind as you won’t need to worry about your valuable items getting lost or stolen if you can help it.
Need more tips on how to move in seamlessly? If yes, feel free to visit our website to learn more.
Although it might be a daunting task, decorating a home can be surprisingly exciting. After all, there are various choices to make. There are rooms to furnish, walls to paint and a decent quantity of upholstery, décor, and hardware to choose from.
Luckily, you're not the only one trying to create a beautiful space, and many interior designers are more than willing to provide tips on how to decorate a home.
So whether you want to give your house a quick makeover or take on a major renovation, these tips might help you!
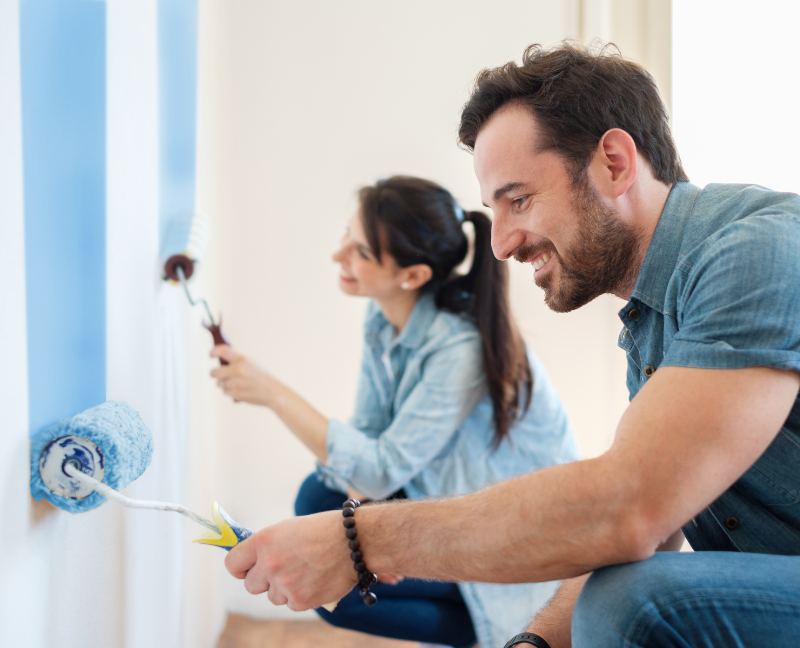
One of the most economical decorative changes you can make to your home is painting the walls, and even painting one wall is a cost-effective (and incredibly cool) improvement.
To give your area a fresh look, get a basic slipcover as opposed to a brand-new sofa.
Consider what you should get rid of before worrying about what you can and cannot afford to acquire. Items that are out of date, worn out, or damaged may be ruining the appearance of your home. If they're not necessary, getting rid of them might offer your home a fresh start.
Instead of purchasing new curtains, upgrade your current set by adding an iron-on accent to simple curtain panels.
A room can be completely changed by framed images, which don't have to be pricey. Try your hand at creating your own work of art and frame it to hang alone or as a component of a gallery wall if you're truly up for the challenge.
DIY Home Decorating Tips - Cheaper Ways To Update Your Home’s Look
Home Staging Tips For Beginners For An Easy Sale
Everything You Should Know About Home Renovation And Transforming A Home On The Market
Faux plants can be used to create stylish décor at an affordable price. Choose a cost-effective solution, then present it on a lovely stand or in a custom-made pot.
Try to purchase it on sale if you have your heart set on something that is out of your price range. Get notifications or sales alerts from shops you want to get an email or SMS in advance if any of their items will reduce its price soon.
Cord concealers are available from reputable sellers like Amazon. Making your home appear effortlessly tidy and organized will depend greatly on if you can hide unsightly cords and wires from the TV or light fixtures.
Your garage's rusty wooden ladder might become your newest favorite decorative item. Use one to keep extra towels or throw blankets after cleaning it up with some sandpaper and possibly a coat of paint.
Purchasing used (pre-loved) furniture and home accessories is a terrific method to save money on items that would otherwise be quite expensive. You never know what secret treasures you'll find in a flea market or thrift shop.
You can give an old-end table a brand-new look with a little paint and creativity. Think about adding gold paint to the edge of a plain black piece.
Plates may make for some very stylish wall décor whether you never use the china from your wedding or the set you scored from an H&M sale. Install the customized plates on an empty wall for a quick update.
Want to add a beach vibe to your room? Then using a glue gun and jute rope, re-decorate an old vase or dish for a rustic touch.
The kitchen is one of the most utilized rooms in the house, so painting the cabinets will give it an instant facelift.
Looking for ways to decorate a home on a budget? Well, your wish is our command!
One of the cost-free decorating concepts simply needs creativity, time, and muscles. By rearranging the furniture, you can give your space a fresh feel.
Re-design a bookcase either by repainting or using removable wallpaper.
A new mirror hung above the vanity or sink is the fastest way to update an outdated bathroom. Luckily, there are many reasonably-priced options you can choose from online.
After your next dinner party, save a few wine bottles and turn them into unique vases. With a little hot water and soap, the labels come right off, leaving behind a slim vase suitable for containing a few fragile stems.
You can find affordable woven baskets at almost any retailer, online and offline.
Woven baskets are only good at keeping your space clutter-free; it also gives a quick Bohemian touch to the room.
Eclectic designs are frequently the simplest to reproduce across the board for interior design. Why? Mixing, not matching, is the key to this aesthetic. It will be far more economical to search for furniture and décor because there is no need to acquire a certain side table or that precise shade of blue.
These are just some decorating tips on a budget that you can consider. If you have more techniques, feel free to share them in the comments below.
New year, new outdoor look!
If you have an outdoor space in your home, you have the opportunity to turn it into an oasis! Whether it’s a large backyard or a tiny patio, your backyard can be a good spot to invite family and friends as the warm weather arrives.
Here are some tips on how to revamp your alfresco.
Reminiscing about a beach vacation? Create a tropical outdoor lounge on your patio or yard. You may buy lounge chairs, chaise lounges, hammocks, and outdoor sectionals online or make your own, like a lounge bed. This outdoor space idea requires a platform bed frame, futon mattress, and outdoor fabric. Pile outdoor pillows on top for comfort and style. Add side tables, candles, and a glass of wine to create an inclusive lounge.
Making a backyard cinema is easy. You can watch movies, TV shows, or whatever you're binging. The outdoor space design ideas need a projector, a taut white sheet, and your phone. If you don't own a projector, you can improvise things like a shoe box, cardboard, and a magnifying lens to construct one easily. Gather your favorite patio chairs or outdoor cushions, make popcorn, and watch a movie with crickets singing.
Why not make your outdoor space a bar since it's the shortest way home? You may buy a bar online, repurpose a table or desk, or create one with cinder blocks, concrete adhesive, and 1 x 6 planks. Bring your Bluetooth speaker, cocktail ingredients, and glasses home to recreate your favorite bar's atmosphere.
Although a barn or shed is a functional building, that doesn't imply it has to be unattractive. Give it a redesign by painting it a striking color, adding shutters, placing flower boxes, laying a stone path, or even hanging lights to brighten up that unused backyard space.
If you spend too much time camping, you'll notice the firepit, everyone's favorite activity. Build an outdoor fire pit in seven easy steps with materials from your local hardware store. You may acquire a prefab fire bowl that gives out the same warm, inviting campfire glow—research local burn regulations and rules to determine the best practices in your area.
Make a backyard or patio dining spot to spice up home nights. Add an outdoor rug, lighting, and a chandelier to change your nighttime dinners. Show your talent as a great cook or you can simply order food you can enjoy with your loved one.
Home is sometimes the best place to center. Create an outdoor meditation space to improve your therapeutic practice. Plant a lavender or jasmine garden, make a stepping stone walk to your meditation location, or add a standing tent or cabana with curtains to catch the mild wind.
These are just some cool outdoor space ideas you can consider to upgrade your patio and you can see more tips on the internet.
Which one is your DIY idea is your favorite?
Share your thoughts in the comment section below.
Looking for DIY ways to improve your home? If yes, then you’re in the right place!
Whether you are looking for simple projects or something more creative, this post will give you ideas on what to do.
You might be one of the many homeowners who have considered starting a home improvement project but ultimately decided against it due to a lack of time or motivation.
Don't feel bad. Half of the homeowners cite finding time to work on home improvement ideas as the most significant challenge. This may be one explanation for the number of unfinished home improvements that homeowners report.
But now that you have the interest, you can start to challenge yourself by doing these DIY ways to improve your home, and let your progress inspire you.
Since many of us are spending most of our time at home, now might be a good time to channel a little of that cabin fever into a project that might add value to your home or infuse it along with new energy.
The following is a list of DIY ways to improve your home:
No plumbing experience is required, and a gleaming new faucet can generate a lot of daily pleasure for only a little effort. All you need is a great attention to detail if you want to avoid flooding your kitchen just because you failed to turn off the water valve.
If you have no idea how to get started, there are lots of installing faucet tutorials online you can follow.
Lighting is one of the few elements that can completely transform the mood of space in such a short amount of time. A new atmosphere can be created for any event simply by replacing an old fixture with a new one or switching from an on-off switch to a dimmer one. If you are familiar with changing out light fixtures, then you should also be comfortable working with switches because they use the same kinds of cables.
This is a good idea for you and your family to work on in advance so you’re ready to spend more time outside when the weather gets nicer. You can make your fire pit in the backyard and throw a S'mores party to celebrate one's accomplishment.
You have various choices to upgrade your home into a smart one, some of which may be as simple as installing a light bulb or plugging in a gadget. It might also include:
Your kitchen can be updated without undergoing extensive remodeling. By replacing the door and drawer pulls, painting your cabinets, or removing the cabinet doors to create an open shelving impression, you may give your space an entirely new appearance. You may create open shelves from scratch if you have too much wall space and need more cabinets.
A barn door that slides on a rail can free up space, modify how furniture is arranged, and give your room a dramatic appearance by replacing a typical swinging door or closet slider. A few tools, an extra set of hands, and detailed step-by-step instructions that explain how to build and install the sliding barn door are needed.
You may not know the word, but you've likely seen this time-honored design feature in various homes. Because accuracy is necessary for this particular task, you will need the right equipment, including a measuring tape, a level, and a miter saw. In addition, patience. But if you can picture a three-dimensional element on your drywall, you're ready to continue to the next step.
If you have the skills to build a garden shed, you may discover various blueprints and how-to guides online that are customized to fit your preferences. And if you need more time to get up to that challenge, you can always add enhancements to the one you already have, or you can go out and purchase a standard model and make it your own. First, consider whether you need it for storage, additional workspace, or additional living space, and then go from there.
If you have yet to find your vocation and wound yourself at a desk job, this is the type of endeavor you can take on. You will become a hero or heroine in your home if you successfully warm your home from the ground up. This labor-intensive idea requires the confidence of an experienced tradesperson and some math abilities. This idea is perfect if you have already decided to replace a room's flooring and have the chance to do so while also including a heating element.
Feel free to share your DIY projects in the comment section below.
8313 W. 10th St
Indianapolis IN 46234
dennis@indyhomepros.com
317-316-8224